Connect to a Cloud instances
You can connect to an instance running within the Memgraph Cloud project via Memgraph Lab, a visual interface, mgconsole, command-line interface, or one of many drivers below.
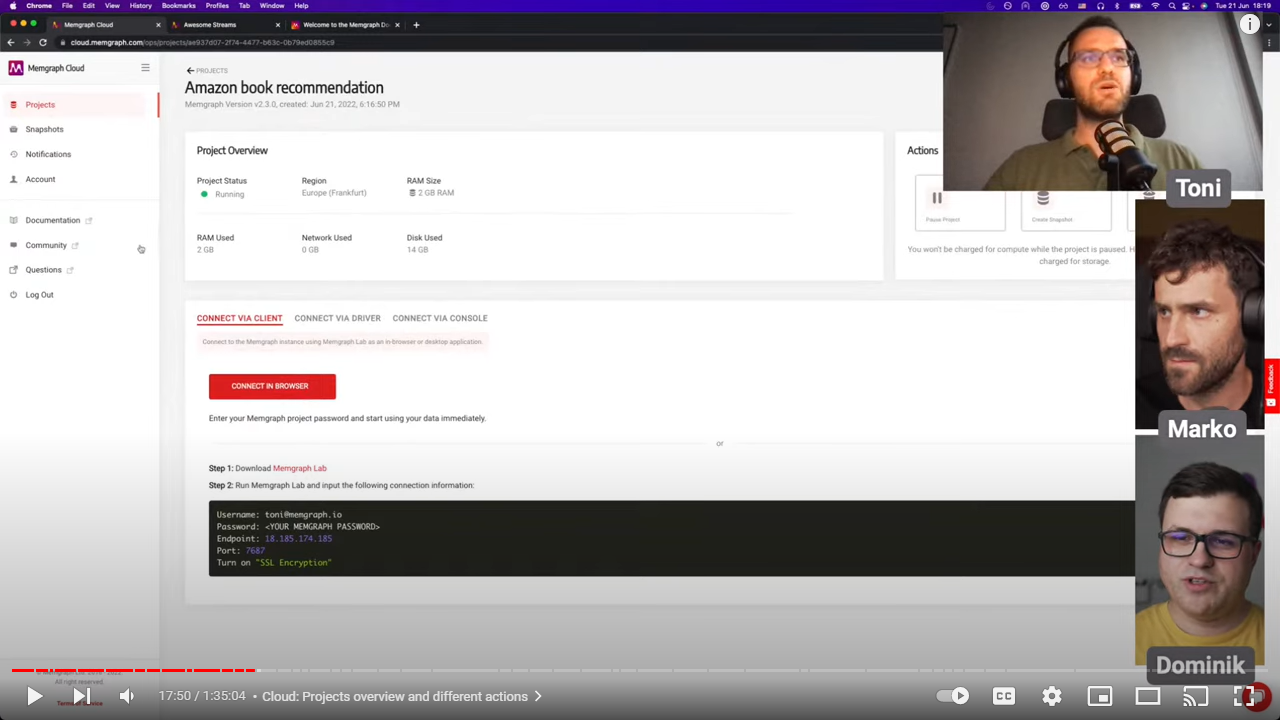
Fell free to watch a demo video made for the Cloud launch that will explain how to connect to Memgraph using Memgraph Cloud:
Connect with Memgraph Lab
Memgraph Lab comes in two flavors, as a desktop application and as an in-browser application.
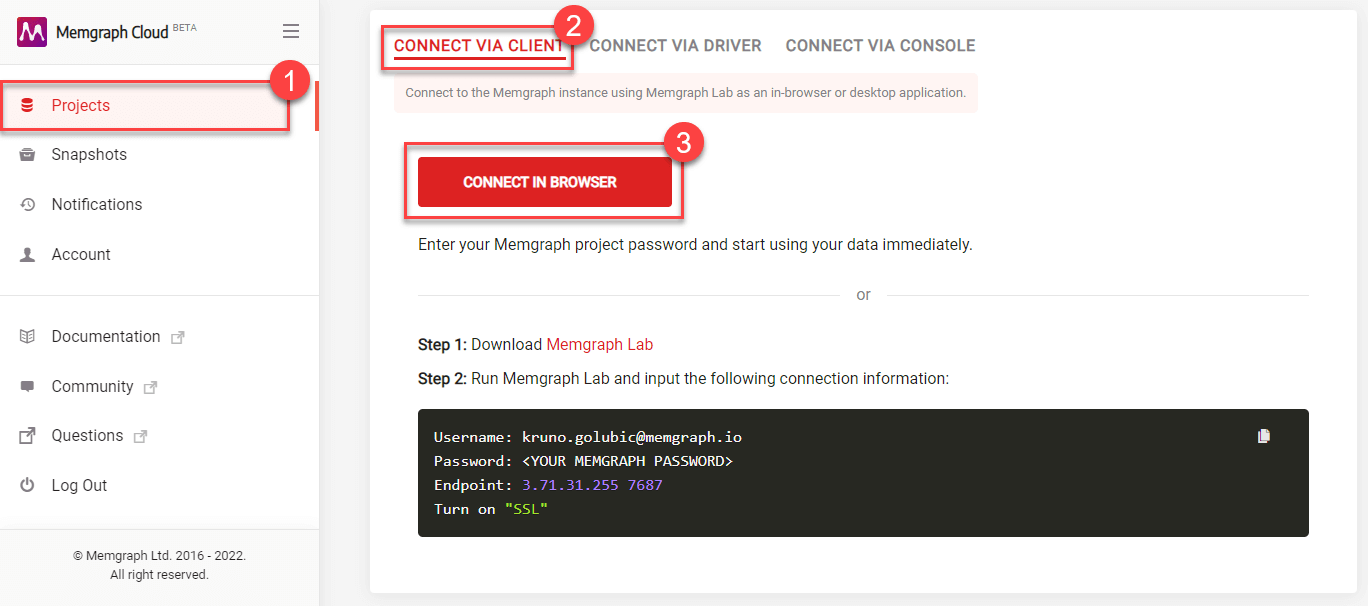
To connect using the in-browser application:
- Click Projects in the left sidebar.
- Locate Connect via client section.
- Click Connect in browser button to open Memgraph Lab in your browser. The login form will be automatically filled with the connection data, except for the password.
To use the desktop version of Memgraph Lab:
- Download Memgraph Lab.
- Open Memgraph Lab and switch to Connect Manually.
- Extend the Advanced Settings and fill out the connection fields with the data from the Connect via client section from the Memgraph Cloud project.
- Enable SSL Encryption and Connect now.
Connect with mgconsole
To connect to Cloud via a command-line interface mgconsole:
- Build mgconsole from source or download it
- Run
mgconsolewith the--host,--port,--username,--passwordanduse-sslparameters set to the values provided in the Connect via console section of the Memgraph Cloud project.
Connect with drivers
Python
Step 1: Install the driver with pip or poetry:
pip install gqlalchemy
# or with Poetry: poetry add gqlalchemy
Step 2: Copy the following code and fill out the missing details (YOUR_MEMGRAPH_PASSWORD, YOUR_MEMGRAPH_USERNAME and MEMGRAPH_HOST_ADDRESS) before running it:
from gqlalchemy import Memgraph

MEMGRAPH_HOST = 'MEMGRAPH_HOST_ADDRESS'
MEMGRAPH_PORT = 7687
MEMGRAPH_USERNAME = 'YOUR_MEMGRAPH_USERNAME'
# Place your Memgraph password that was created during Project creation
MEMGRAPH_PASSWORD = 'YOUR_MEMGRAPH_PASSWORD'

def hello_memgraph(host: str, port: int, username: str, password: str):
    connection = Memgraph(host, port, username, password, encrypted=True)
    results = connection.execute_and_fetch(
        'CREATE (n:FirstNode { message: "Hello Memgraph from Python!" }) RETURN n.message AS message'
    )
    print("Created node with message:", next(results)["message"])

if __name__ == "__main__":
    hello_memgraph(MEMGRAPH_HOST, MEMGRAPH_PORT, MEMGRAPH_USERNAME, MEMGRAPH_PASSWORD)
Read more about it on GQLAlchemy Quick Start Guide.
Rust
Rust driver rsmgclient is implemented as a wrapper around mgclient, the official Memgraph client library. You will need to install mgclient before using rsmgclient.
Step 1: Install mgclient, which is a C library interface for the Memgraph database. Follow the installation instructions from GitHub main page.
git clone https://github.com/memgraph/mgclient
# Install the library by following the GitHub installation instructions
Step 2: Add the following line to the Cargo.toml file under the line [dependencies]:
rsmgclient = "2.0.0"
Step 3: Copy the following code and fill out the missing details (YOUR_MEMGRAPH_PASSWORD, YOUR_MEMGRAPH_USERNAME and MEMGRAPH_HOST_ADDRESS) before running it:
use rsmgclient::{ConnectParams, Connection, MgError, Value, SSLMode};

fn execute_query() -> Result<(), MgError> {
    // Connect to Memgraph.
    let connect_params = ConnectParams {
        host: Some(String::from("MEMGRAPH_HOST_ADDRESS")),
        port: 7687,
        username: Some(String::from("YOUR_MEMGRAPH_USERNAME")),
        password: Some(String::from("YOUR_MEMGRAPH_PASSWORD")),
        sslmode: SSLMode::Require,
        ..Default::default()
    };
    let mut connection = Connection::connect(&connect_params)?;

    // Create simple graph.
    connection.execute_without_results(
        "CREATE (p1:Person {name: 'Alice'})-[l1:Likes]->(m:Software {name: 'Memgraph'}) \
         CREATE (p2:Person {name: 'John'})-[l2:Likes]->(m);",
    )?;

    // Fetch the graph.
    let columns = connection.execute("MATCH (n)-[r]->(m) RETURN n, r, m;", None)?;
    println!("Columns: {}", columns.join(", "));
    for record in connection.fetchall()? {
        for value in record.values {
            match value {
                Value::Node(node) => print!("{}", node),
                Value::Relationship(edge) => print!("-{}-", edge),
                value => print!("{}", value),
            }
        }
        println!();
    }
    connection.commit()?;

    Ok(())
}

fn main() {
    if let Err(error) = execute_query() {
        panic!("{}", error)
    }
}
Read more about it on Rust Quick Start Guide.
C++
Step 1: Install mgclient, which is a C library interface for the Memgraph database. Follow the installation instructions from GitHub main page.
git clone https://github.com/memgraph/mgclient
# Install the library by following the GitHub installation instructions
Step 2: Copy the following code and fill out the missing details (YOUR_MEMGRAPH_PASSWORD, YOUR_MEMGRAPH_USERNAME and MEMGRAPH_HOST_ADDRESS) before running it:
#include <cstdlib>
#include <iostream>

#include <mgclient.hpp>

int main(int argc, char *argv[]) {
  mg::Client::Init();

  mg::Client::Params params;
  params.host = "MEMGRAPH_HOST_ADDRESS";
  params.port = "7687";
  params.username = "YOUR_MEMGRAPH_USERNAME";
  params.password = "YOUR_MEMGRAPH_PASSWORD";
  params.use_ssl = true;
  auto client = mg::Client::Connect(params);

  if (!client) {
    std::cerr << "Failed to connect!\n";
    return 1;
  }

  if (!client->Execute("CREATE (n:FirstNode {message: 'Hello Memgraph from C++!'}) RETURN n")) {
    std::cerr << "Failed to execute query!\n";
    return 1;
  }

  while (const auto maybe_result = client->FetchOne()) {
    const auto result = *maybe_result;
    if (result.size() < 1) {
      continue;
    }
    const auto value = result[0];
    if (value.type() != mg::Value::Type::Node) {
      continue;
    }
    const auto node = value.ValueNode();
    const auto props = node.properties();
    std::cout << "Created node: " << props["message"].ValueString() << std::endl;
  }

  // Deallocate the client because mg_finalize has to be called globally.
  client.reset(nullptr);

  mg::Client::Finalize();

  return 0;
}
Java
Step 1: Add the following driver dependency in your pom.xml file:
<dependency>
  <groupId>org.neo4j.driver</groupId>
  <artifactId>neo4j-java-driver</artifactId>
  <version>4.1.1</version>
</dependency>
If you want to use neo4j-java-driver v5, please connect to the local instance following the instructions on Java Quick Start Guide.
Step 2: Copy the following code and fill out the missing details (YOUR_MEMGRAPH_PASSWORD, YOUR_MEMGRAPH_USERNAME and MEMGRAPH_HOST_ADDRESS) before running it:
import org.neo4j.driver.AuthTokens;
import org.neo4j.driver.Driver;
import org.neo4j.driver.GraphDatabase;
import org.neo4j.driver.Session;
import org.neo4j.driver.Result;
import org.neo4j.driver.Transaction;
import org.neo4j.driver.TransactionWork;

import static org.neo4j.driver.Values.parameters;

public class HelloMemgraph implements AutoCloseable
{
    private final Driver driver;

    public HelloMemgraph( String uri, String username, String password )
    {
        driver = GraphDatabase.driver( uri, AuthTokens.basic( username, password ) );
    }

    public void close() throws Exception
    {
        driver.close();
    }

    public void createAndPrintNode( final String message )
    {
        try ( Session session = driver.session() )
        {
            String nodeMessage = session.writeTransaction( new TransactionWork<String>()
            {
                @Override
                public String execute( Transaction tx )
                {
                    Result result = tx.run( "CREATE (n:FirstNode {message: $message}) " +
                                            "RETURN id(n) AS nodeId, n.message AS message",
                            parameters( "message", message ) );
                    return result.single().get( 1 ).asString();
                }
            } );
            System.out.println( "Created node:", nodeMessage );
        }
    }

    public static void main( String... args ) throws Exception
    {
        try ( HelloMemgraph program = new HelloMemgraph( "bolt+ssc://MEMGRAPH_HOST_ADDRESS:7687", "YOUR_MEMGRAPH_USERNAME", "YOUR_MEMGRAPH_PASSWORD" ) )
        {
            program.createAndPrintNode( "Hello Memgraph from Java!" );
        }
    }
}
Read more about it on Java Quick Start Guide.
C#
Step 1: Install the driver with Package Manager:
Install-Package Neo4j.Driver.Simple@4.4.0
If you want to use Neo4j.Driver.Simple v5, please connect to the local instance following the instructions on C# Quick Start Guide.
Step 2: Copy the following code and fill out the missing details (YOUR_MEMGRAPH_PASSWORD, YOUR_MEMGRAPH_USERNAME and MEMGRAPH_HOST_ADDRESS) before running it:
using System;
using System.Linq;
using Neo4j.Driver;

namespace MemgraphApp
{
    public class Program : IDisposable
    {
        private readonly IDriver _driver;
        public Program(string uri, string user, string password)
        {
            _driver = GraphDatabase.Driver(uri, AuthTokens.Basic(user, password));
        }
        public void CreateAndPrintNode(string message)
        {
            using (var session = _driver.Session())
            {
                var nodeMessage = session.WriteTransaction(tx =>
                {
                    var result = tx.Run("CREATE (n:FirstNode {message: $message}) " +
                                        "RETURN id(n) AS nodeId, n.message AS message",
                        new { message });
                    return result.Single()[1].As<string>();
                });
                Console.WriteLine("Created node:", nodeMessage);
            }
        }
        public void Dispose()
        {
            _driver?.Dispose();
        }
        public static void Main()
        {
            using (var program = new Program("bolt+ssc://MEMGRAPH_HOST_ADDRESS:7687", "YOUR_MEMGRAPH_USERNAME", "YOUR_MEMGRAPH_PASSWORD"))
            {
                program.CreateAndPrintNode("Hello Memgraph from C#!");
            }
        }
    }
}
Read more about it on C# Quick Start Guide.
Golang
Step 1: Make sure your application has been set up to use go modules (there should be a go.mod file in your application root). Add the driver with:
go get github.com/neo4j/neo4j-go-driver/v5
Step 2: Copy the following code and fill out the missing details (YOUR_MEMGRAPH_PASSWORD, YOUR_MEMGRAPH_USERNAME and MEMGRAPH_HOST_ADDRESS) before running it:
package main

import (
    "fmt"
    "github.com/neo4j/neo4j-go-driver/v5/neo4j"
)

func main() {
    dbUri := "bolt+ssc://MEMGRAPH_HOST_ADDRESS:7687"
    driver, err := neo4j.NewDriver(dbUri, neo4j.BasicAuth("YOUR_MEMGRAPH_USERNAME", "YOUR_MEMGRAPH_PASSWORD", ""))
    if err != nil {
        panic(err)
    }

    defer driver.Close()
    item, err := insertItem(driver)
    if err != nil {
        panic(err)
    }
    fmt.Printf("%v\n", item.Message)
}

func insertItem(driver neo4j.Driver) (*Item, error) {

    session := driver.NewSession(neo4j.SessionConfig{})
    defer session.Close()
    result, err := session.WriteTransaction(createItemFn)
    if err != nil {
        return nil, err
    }
    return result.(*Item), nil
}

func createItemFn(tx neo4j.Transaction) (interface{}, error) {
    records, err := tx.Run(
        "CREATE (a:Greeting) SET a.message = $message RETURN 'Node ' + id(a) + ': ' + a.message",
        map[string]interface{}{"message": "Hello Memgraph from Go!"})

    if err != nil {
        return nil, err
    }
    record, err := records.Single()
    if err != nil {
        return nil, err
    }

    return &Item{
        Message: record.Values[0].(string),
    }, nil
}

type Item struct {
    Message string
}
Read more about it on Go Quick Start Guide.
PHP
Step 1: Install the driver with composer:
composer require stefanak-michal/memgraph-bolt-wrapper
Step 2: Copy the following code and fill out the missing details (YOUR_MEMGRAPH_PASSWORD, YOUR_MEMGRAPH_USERNAME and MEMGRAPH_HOST_ADDRESS) before running it:
<?php
require_once __DIR__ . '/vendor/autoload.php';

// Create a connection class and specify target host and port.
$conn = new \\Bolt\\connection\\StreamSocket('MEMGRAPH_HOST_ADDRESS', '7687');
$conn->setSslContextOptions([
    'peer_name' => 'Memgraph DB',
    'allow_self_signed' => true
]);

// Create a new Bolt instance and provide a connection object.
$bolt = new \\Bolt\\Bolt($conn);

// Set available Bolt versions for Memgraph.
$bolt->setProtocolVersions(4.1, 4, 3);

// Build and get protocol version instance which creates connection and executes a handshake.
$protocol = $bolt->build();

// Login to database with credentials
$protocol->hello(\\Bolt\\helpers\\Auth::basic('YOUR_MEMGRAPH_USERNAME', 'YOUR_MEMGRAPH_PASSWORD'));

// Pipeline two messages. One to execute query with parameters and second to pull records.
$protocol
    ->run('CREATE (a:Greeting) SET a.message = $message RETURN id(a) AS nodeId, a.message AS message', ['message' => 'Hello, World!'])
    ->pull();

// Server responses are waiting to be fetched through iterator.
$rows = iterator_to_array($protocol->getResponses(), false);

// Get content from requested record.
$row = $rows[1]->getContent();
echo 'Node ' . $row[0] . ' says: ' . $row[1];
Read more about it on PHP Quick Start Guide.
node.js
Step 1: Install the driver with npm:
npm install neo4j-driver
Step 2: Copy the following code and fill out the missing details( YOUR_MEMGRAPH_PASSWORD, YOUR_MEMGRAPH_USERNAME and MEMGRAPH_HOST_ADDRESS ) before running it:
const neo4j = require('neo4j-driver')

const MEMGRAPH_URI = 'bolt+ssc://MEMGRAPH_HOST_ADDRESS:7687';
const MEMGRAPH_USERNAME = 'YOUR_MEMGRAPH_USERNAME';
// Place your Memgraph password that was created during Project creation
const MEMGRAPH_PASSWORD = 'YOUR_MEMGRAPH_PASSWORD';

const helloMemgraph = async (uri, username, password) => {
    const driver = neo4j.driver(uri, neo4j.auth.basic(username, password));

    const session = driver.session();
    const message = 'Hello Memgraph from Node.js!';

    try {
        const result = await session.run(
            `CREATE (n:FirstNode {message: $message}) RETURN n`,
            { message },
        );

        const singleRecord = result.records[0];
        const node = singleRecord.get(0);

        console.log('Created node:', node.properties.message);
    } finally {
        await session.close()
    }

    await driver.close()
};

helloMemgraph(MEMGRAPH_URI, MEMGRAPH_USERNAME, MEMGRAPH_PASSWORD)
    .catch((error) => console.error(error));
Read more about it on Node.js Quick Start Guide.